
This article will show some of the basic workflow steps of navigating and scoring in the Enso scoring viewer
Disclaimer: These are general workflow guidelines and may not reflect your specific clinic. Consult a clinic manager or Enso support if you have questions about your clinic-specific workflows.- When you log in, you will be automatically directed to the To Do tab on the Patients page. This tab will contain all studies you are directly assigned to.
The My Studies tab contains all studies you have access to. These may be studies assigned to you as well as studies in your Location(s) and Pool(s).
If you have access to the All tab it will contain all studies in the entire clinic, regardless of assignment or location.
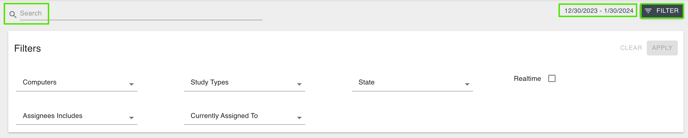
- Find the patient you are trying to score either by scrolling through the patient list or using the search bar. If you cannot find it, be sure to check and adjust the date range. You can search by First/Last name or Acquisition ID.
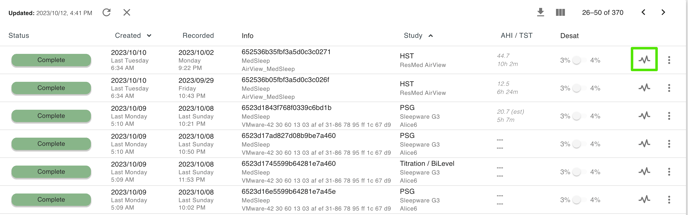
- The studies are sorted by descending Created Time (newest on top).
- EnsoData will automatically load the last 30 days of studies. If the study you are looking for is older than 30 days, adjust the dates by using the filter in the upper right.
- You can filter by other parameters such as study assignee or study type.
- To begin scoring a study, click the waveform icon on the right side of the page.
- There will be a popup window with options Open or Create.
- If you're a technologist, you will CREATE based on PREPARED and enter your name or initials and today's date. Then click Proceed.
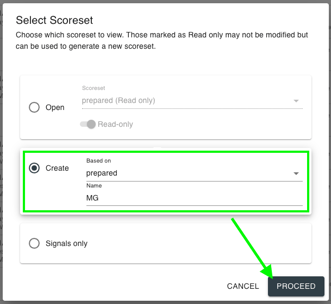
- This will open the Channels window and you can begin over-scoring the study. "Prepared" is the scoreset Enso has "prepared" for you to overscore.
- Scroll epoch by epoch by using the arrow keys on your keyboard (right is forward, left is back)
Scroll page by page by using the page up/page down keys on your keyboard. Up is forward, down is back.
You can also use your mouse scroll-wheel to scroll through the study. - To score events, click and drag on the channel you would like to score on.
To change an event, right click on the event and there will be a pop up with event options.
To delete an event you can either right click and delete or hover your mouse over the event and click the Delete key on your keyboard.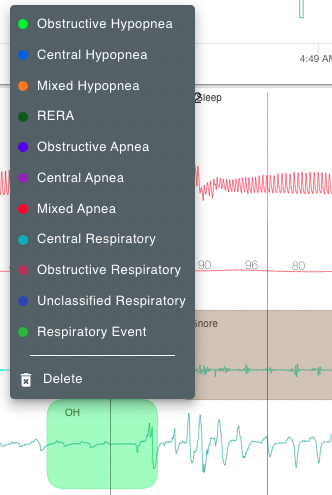
- Notice the icons in the upper right corner of the Channels View

- The Play button will auto-scroll the study. Control the speed of the auto scroll by using the Fast/Slow arrow buttons next to it.
- The Notes icon allows you to type general study notes.
- The Settings gear icon allows you to customize and save your montage, hide and filter channels, and re-order your staging hypnogram. For detailed information on creating your montages, please refer to this page.
- The Info (i) button will show you keyboard shortcuts for study scoring and navigation.
- The rectangular List icon will show study metadata such as the desat% and current AHI calculation.
- The Clock icon will show Audit Logs for the study. The time zone of this audit log is UTC, so you may need to calculate to accommodate your time zone.
- The CHANNELS tab will show the channels for scoring the study.
- The TRENDS tab will show an all-night hypnogram and titration graph (if applicable) with plots for each event.
- The EVENTS tab will give you a list of every event in the study. You can filter the events to look for specific ones. Click on an event to view it in the CHANNELS tab.
- The PATIENT tab will show the basic patient information. This can be updated as needed and the changes will reflect on the report.
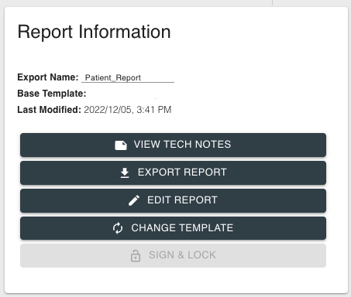
- The REPORT tab is where the users will run, edit, view, sign, and export the patient reports.
- The data in the report automatically calculates and refreshes as you are scoring the study.
- Select the appropriate report template based on the type of study.
- View Tech Notes allows you to view the list of tech notes taken throughout the study. Clicking on a tech note will take you to that point in the study.
- Export Report will export a PDF of the report.
- Edit Report will allow you to make any edits or comments in the report.
- If you want to completely refresh the report, use Change Template to reload from the base template. This will erase any changes you made to the prior copy.
- The Sign & Lock button will only be available to those with the ability to lock the report and study from further editing. This permission is usually reserved for physicians and admins. This will apply the electronic signature and date-time stamp of the user who clicks the button.
- If edits need to be made after the report is Locked, it will need to be unlocked by a user with study:unlock permissions - usually an admin or physician, and then locked again afterwards.
- After scoring, creating report, or signing & locking a report, you will need to assign it to the next step in the process. To do this, click on the person icon in the upper right corner of the page.
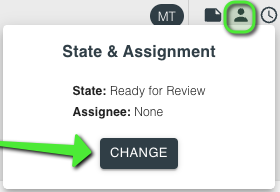
Select the Change button and select the next State in the process. After selecting the State there will be a pop up to assign the user. This will allow the study to show up in the appropriate user's queue for the next step in the process. - When you have completed the report review, you can exit to the patient list by clicking the back arrow in the upper left next to the patient's name.
If you would like further training or have any questions, please reach out to support@ensodata.com