
Below are the basic steps for navigating through the EnsoSleep Study Management application as a physician
- You should have received an account activation email from connect@ensodata.com. Make sure to double-check your spam or junk folder! If you have not received a log in, please contact your clinic admin.
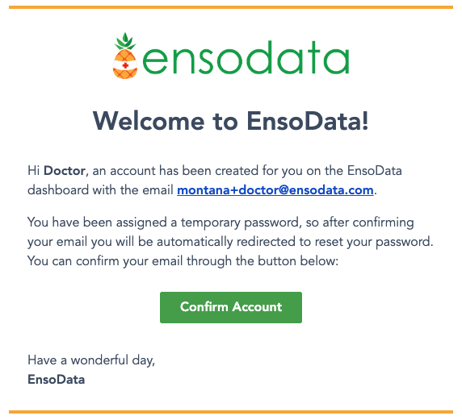
- After clicking Confirm Account in the email you will be directed to set your password.
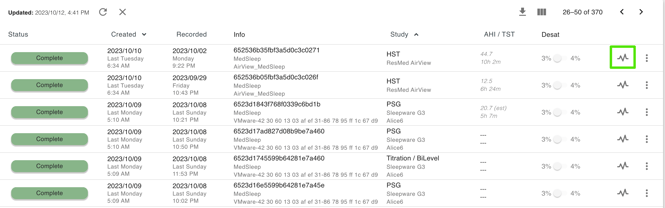
- After entering your password, you'll be taken directly to the dashboard. Here you'll see your assigned patients in your To Do tab.
The To Do tab consists of all studies you are directly assigned to.
- The list will sort by descending Created Time. You can search for the patient you are looking for by using the search bar, or scrolling through the list. If you cannot find it, be sure to check and adjust the date range.
- EnsoData will automatically display the last 30 days of studies. If your study is older than that you will need to adjust the dates.
- To begin interpreting a study in your queue, click on the waveform icon on the left side of a patient record.
- A popup window will show up. To interpret the study, click Open.
The scoreset from your tech should load by default, but if not use the drop down to select the scoreset containing the name and/or initials of the tech.
Toggle OFF the Read-Only switch so it is grey.
Click Proceed.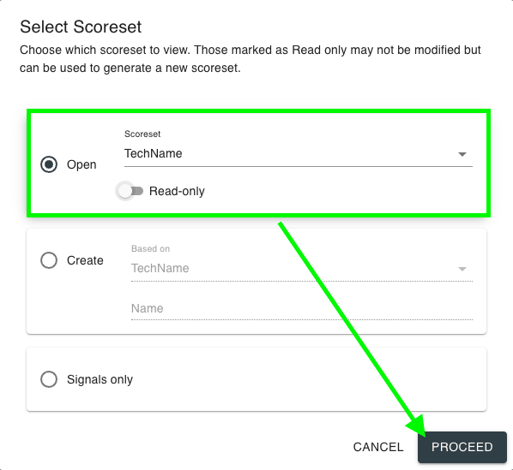
Study Navigation:
- Scroll by epoch by using the arrow keys on your keyboard. Scroll by page by using the page up/page down keys on your keyboard. You can also use your mouse scroll-wheel.
- The file can be scored and reviewed by using the CHANNELS tab.
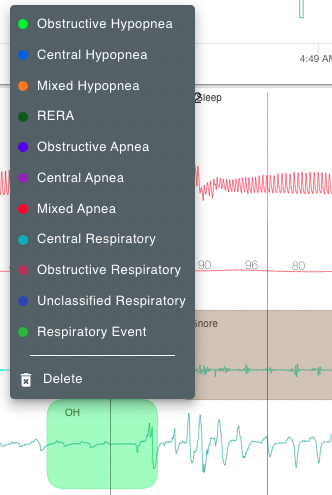
- To edit an event, right-click on it to change the type.
- To create an event, drag and drop on the channel.
- To delete an event, right-click and select the Delete option or hover with your mouse and click the 'delete' key on your keyboard.
- To edit the viewing window, click the gear icon in the upper right-hand corner of the screen and you can switch your Timespan of the viewing window from 10 seconds to 10 minutes.
For detailed information on creating your montages from this menu, please refer to this page.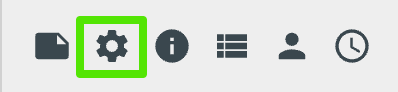
- The page icon is for study notes.
The gear icon will allow you to save and edit your personal montages.
The (i) button gives info on keyboard shortcuts.
The list icon contains study metadata information.
The person icon is to edit the study status and assignee.
The clock icon shows the audit log. - The TRENDS tab will show a hypnogram-style overview of all the events throughout the night.
- The EVENTS tab will show a complete list of events throughout the night you can filter to see specific events.
- The PATIENT tab will allow you to make any edits to the patient information.
Study Reports:
- After your review is finished, click on the REPORT tab. You should see a report generated for you. To add interpretation comments, click the EDIT REPORT button in the box to the right of the report.
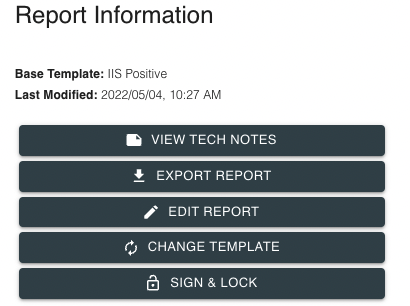
- Here you can review and add your interpretation to the report. If you need to refer back to any of the other study tabs, remember to SAVE your progress on the report before navigating off the Report tab.
- Once satisfied with the study and the report, apply your electronic signature to the study using the Sign & Lock button. After this, the study will no longer be editable unless the study is unlocked.
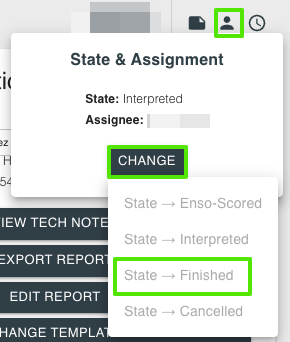
- Once the report is signed and locked, click the person icon in the upper right. Click Change to assign the study to your clinic admin by changing the status to Finished. The admin's name should automatically populate as the new assignee.
- Then the report can be exported and downloaded as a PDF.
- Use the back button in the upper left by the patient's name to go back to the main page.